
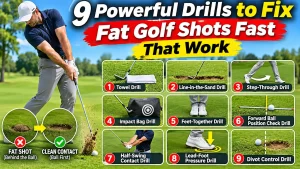
9 Powerful Drills to Fix Fat Golf Shots Fast That Work
9 Best Drills to Fix Fat Golf Shots and Improve Iron Contact
Introduction: Why You Need Drills to Fix Fat Golf Shots Fast
Few things are more frustrating in golf than making what feels like a perfect swing, only to watch your golf ball travel a fraction of the intended distance. Fat golf shots can destroy your confidence, reduce accuracy, and make even the simplest iron shots feel impossible. Fortunately, learning the right drills to fix fat golf shots fast can help you develop cleaner contact, improve your swing mechanics, and build greater consistency throughout your golf game.
A fat golf shot occurs when your club strikes the ground before making contact with the golf ball. Instead of transferring maximum energy into the ball, your club loses speed as it digs into the turf. The result is often a weak, poorly struck shot that falls well short of your intended target. Repeated fat shots can also make it difficult to develop confidence with your irons and wedges.
Several common swing problems contribute to this frustrating mistake. Poor weight transfer, incorrect golf swing mechanics, inconsistent ball positioning, and improper golf swing low point control can all cause your club to contact the ground too early. Understanding these problems is the first step toward achieving consistent ball striking.
If you’re wondering how to stop hitting fat golf shots, the solution isn’t necessarily swinging harder or completely rebuilding your golf swing. Instead, targeted practice drills can help you identify specific weaknesses and develop better movement patterns through repetition and immediate feedback.
In this guide, you’ll discover nine powerful golf drills designed to improve your impact position, encourage proper weight transfer, and promote ball-first contact. Whether you’re a beginner struggling with heavy iron shots or an experienced golfer looking for greater consistency, these practical exercises can help you build a more reliable swing.
Ready to eliminate those frustrating fat shots and start striking your irons more cleanly? Let’s get started!
What Causes Fat Golf Shots? Understanding the Root Problems
Before practicing drills to fix fat golf shots fast, it’s important to understand why your club strikes the ground before reaching the golf ball. Fat shots usually result from problems involving swing mechanics, weight transfer, ball positioning, or impact control. Identifying the underlying cause allows you to make targeted improvements instead of repeatedly practicing the same mistakes.
Incorrect Golf Swing Low Point
Your golf swing low point is the lowest position your clubhead reaches during its swing arc. When hitting irons, this point should generally occur slightly ahead of the golf ball, allowing the club to strike the ball before contacting the turf.
If your swing reaches its lowest point behind the ball, the clubhead strikes the ground prematurely. This creates heavy contact, reduces clubhead speed, and produces shorter, less accurate shots. Learning to control your swing’s low point is essential for consistent ball striking.
Poor Weight Transfer During the Downswing
Proper weight transfer plays an important role in achieving clean iron contact. During the downswing, pressure should shift toward your lead foot, helping position your body’s movement and swing arc for effective impact.
When too much pressure remains on your trail foot, your swing’s low point may shift backward, increasing the likelihood of hitting behind the ball. Practicing a controlled pressure shift can help improve contact without excessive lateral movement.
Improper Golf Impact Position
Your golf impact position determines how effectively the clubhead delivers energy into the ball. Excessive backward shaft lean, releasing the club too early, or allowing your upper body to fall behind the ball can contribute to fat shots.
A more effective impact position generally features the hands slightly ahead of the clubhead when striking an iron, with appropriate body rotation and pressure toward the lead side. These fundamentals promote a more predictable impact.
Inconsistent Ball-First Contact
Achieving ball first contact is one of the most important fundamentals of successful iron play. Ideally, the clubhead strikes the golf ball before brushing or entering the turf.
When ground contact occurs first, the club loses energy before reaching the ball, producing weak and inconsistent shots.
By improving low-point control, weight transfer, and impact mechanics, golfers can develop cleaner contact, better distance control, and greater confidence with their irons.
9 Powerful Drills to Fix Fat Golf Shots Fast That Work
If you’re tired of hitting behind the golf ball and losing valuable distance, practicing the right techniques can make a noticeable difference in your performance. The following drills to fix fat golf shots fast focus on improving your golf swing low point, developing proper weight transfer, and creating more consistent ball-first contact.
Each drill targets a specific aspect of your swing, helping you identify common mistakes and develop better habits through focused practice. Whether you’re practicing at the driving range or working on your swing at home, these exercises can help you build a more reliable foundation for cleaner, more accurate iron shots.
1. The Towel Drill: Train Your Club to Strike the Ball First
The towel drill is one of the most effective fat golf shot drills for golfers who consistently strike the ground before contacting the ball. This simple exercise provides immediate feedback about your clubhead’s contact point, helping you develop better control over your golf swing low point without making complicated mechanical adjustments.
The objective is straightforward: strike the golf ball cleanly without allowing your clubhead to touch the towel positioned behind it.
How to Perform the Towel Drill
1. Position your golf ball: Place a golf ball on closely mown grass at the driving range or another suitable practice area.
2. Set up the towel: Fold a small towel flat and position it approximately 4–6 inches behind the ball, away from your intended target.
3. Use a short iron: Start with an 8-iron or 9-iron to make controlling your swing easier.
4. Make controlled practice swings: Begin with half swings, focusing on striking the golf ball before the clubhead reaches the turf.
5. Monitor your contact: If your club strikes the towel, your swing may be bottoming out too early.
6. Gradually increase your swing speed: Once you consistently avoid the towel, progress to three-quarter swings before attempting full swings.
Why This Drill Improves Ball-First Contact
The towel creates a physical reference point that encourages your clubhead to approach the ball without striking the ground prematurely. With repeated practice, you can improve your awareness of where your swing reaches its lowest point.
Developing better ball first contact helps preserve clubhead speed through impact, producing cleaner iron shots and more predictable distance control.
Common Mistakes to Avoid
One common mistake is lifting your upper body during the downswing to avoid hitting the towel. This can create additional swing problems, including thin or topped shots.
Instead, maintain your posture, allow your pressure to move naturally toward your lead foot, and focus on making a balanced swing.
Avoid swinging aggressively before developing consistent contact. Start slowly, evaluate your results, and gradually increase your speed as your confidence improves.
Pro Tip: Practice 10–15 controlled shots while monitoring whether your club strikes the towel. As your contact improves, gradually move the towel slightly closer to the ball to increase the challenge. Keep it flat and avoid forcing an exaggerated downward strike.
With regular practice, the towel drill can help you develop better low-point control, improve your iron contact, and build the consistency needed to eliminate frustrating fat golf shots.
1. The Towel Drill: Train Your Club to Strike the Ball First
The towel drill is one of the most effective fat golf shot drills for golfers who struggle with hitting the ground before making contact with the golf ball. This simple exercise helps you identify where your clubhead strikes the turf, improve your golf swing low point, and develop the consistent ball-first contact needed for cleaner, more powerful iron shots.
When you hit a fat golf shot, your clubhead reaches the ground too early, losing valuable speed and energy before striking the ball. By positioning a towel several inches behind the golf ball, you create an immediate feedback system that helps identify this common swing mistake.
How to Perform the Towel Drill
Follow these simple steps to improve your contact and develop greater consistency:
1. Position your golf ball: Place a golf ball on a closely mown practice area where you can make normal iron swings.
2. Place a towel behind the ball: Fold a small towel flat and position it approximately 4–6 inches behind the golf ball, away from your target.
3. Choose a short iron: Start with an 8-iron or 9-iron to make controlling your swing easier.
4. Make controlled half swings: Focus on striking the golf ball cleanly without allowing your clubhead to contact the towel.
5. Evaluate your results: If your clubhead strikes the towel, you may be reaching the bottom of your swing arc too early.
6. Increase your swing speed gradually: Once you consistently avoid the towel, progress to three-quarter swings and eventually full swings.
Why This Drill Improves Ball-First Contact
The towel drill encourages better awareness of your clubhead’s position throughout the downswing. By learning to avoid the towel while maintaining a natural swing, you can improve your ability to position the lowest point of your swing slightly ahead of the golf ball.
Developing reliable ball first contact allows your club to strike the ball before interacting with the turf, helping preserve clubhead speed and produce more consistent iron distances.
Common Mistakes to Avoid
One of the biggest mistakes golfers make is lifting their upper body to avoid hitting the towel. This can lead to thin shots, topped balls, and inconsistent contact.
Instead, maintain your posture, encourage proper pressure transfer toward your lead foot, and allow your arms and body to work together naturally.
Avoid swinging too aggressively before mastering the movement. Start with controlled swings and gradually increase your speed as your contact improves.
Pro Tip: Practice 10–15 shots while monitoring your contact. Once you consistently avoid the towel, move it slightly closer to the ball to increase the difficulty. Keep the towel flat and securely positioned, and avoid attempting to strike sharply downward just to clear it.
By incorporating this exercise into your practice routine, you’ll develop better low-point control, improve your iron striking, and take an important step toward eliminating frustrating fat golf shots
2. The Line-in-the-Sand Drill: Master Your Golf Swing Low Point
The line-in-the-sand drill is one of the simplest and most effective drills to fix fat golf shots fast because it teaches golfers exactly where their clubhead contacts the ground during the downswing. If you frequently strike the turf before reaching the golf ball, this exercise provides immediate visual feedback that can help you develop better low-point control and achieve more consistent ball striking.
Your golf swing low point is the lowest position your clubhead reaches during its swing arc. When hitting irons, the ideal low point generally occurs slightly ahead of the golf ball, allowing you to strike the ball before taking a divot. This drill helps you develop that essential movement without complicated swing adjustments.
How to Perform the Line-in-the-Sand Drill
Follow these steps to improve your clubhead control and eliminate unnecessary ground contact:
1. Find a suitable practice surface: Use a designated practice bunker, sandy practice area, or a golf practice mat that allows you to mark a straight line.
2. Draw a straight line: Use your club or an alignment stick to create a visible line perpendicular to your target line.
3. Position your club correctly: Set up as though a golf ball were resting directly on the line, using your normal iron stance and posture.
4. Make controlled practice swings: Begin with short, smooth swings while focusing on contacting the ground slightly ahead of the line, toward your intended target.
5. Examine your contact point: Check where your clubhead first disturbed the sand. If the mark begins behind the line, your swing is reaching the ground too early.
6. Repeat and adjust: Continue practicing until you consistently make contact on the target side of the line.
Why This Drill Improves Consistent Ball Striking
The biggest advantage of this exercise is its immediate feedback. Instead of guessing where your club contacts the ground, you can clearly see the results of each swing.
As you improve your ability to control the swing’s lowest point, you’ll develop better coordination between your body rotation, pressure transfer, and clubhead movement.
This improved control can help you produce cleaner iron shots, more predictable distances, and greater confidence when approaching the green.
How to Track Your Progress
Start by performing 10 practice swings and recording how many times your club contacts the ground on the target side of the line.
For example, if six out of ten swings produce the desired contact, your initial success rate is 60%. Repeat the exercise during future practice sessions and monitor your improvement.
Pro Tip: Once you consistently achieve clean contact without a ball, introduce golf balls on a suitable grass practice area. Use a marked reference line and focus on striking the ball before the turf, with your divot beginning on the target side of the ball’s original position.
By practicing this drill regularly, you can improve your golf swing low point, reduce fat shots, and develop the reliable contact needed for consistent ball striking.
3. The Step-Through Drill: Improve Proper Weight Transfer
The step-through drill is one of the most effective golf fat shot fixes for golfers who struggle to transfer pressure correctly during the downswing. Poor weight transfer can cause your clubhead to strike the ground behind the golf ball, resulting in weak contact, reduced distance, and inconsistent iron shots. By practicing this simple movement, you can develop better balance, improve your golf swing mechanics, and encourage cleaner ball-first contact.
During an effective golf swing, pressure shifts toward your lead foot as the downswing begins. This movement helps position your body and swing arc for solid impact. When too much pressure remains on your trail foot, your swing’s lowest point may move behind the ball, increasing the likelihood of hitting fat shots.
How to Perform the Step-Through Drill
Follow these steps to develop proper weight transfer and improve your downswing sequence:
1. Choose a short iron: Start with an 8-iron or 9-iron and practice in an open area where you have enough room to move safely.
2. Set up with a narrow stance: Position your feet slightly closer together than normal while maintaining a comfortable golf posture.
3. Make a controlled backswing: Swing the club back to approximately waist height while allowing pressure to move naturally toward your trail foot.
4. Shift pressure toward your lead foot: As you begin the downswing, transfer pressure forward and allow your lead foot to support your movement.
5. Step through after impact: Continue rotating toward the target and allow your trail foot to step forward naturally during the follow-through.
6. Finish in balance: Hold your finishing position briefly to confirm that your movement remains controlled.
Why This Drill Improves Golf Swing Mechanics
The step-through drill encourages your lower body and upper body to work together during the downswing. Instead of hanging back on your trail foot, you learn to transfer pressure forward while maintaining a balanced swing.
This movement can help shift your golf swing low point toward the target, making it easier to strike the golf ball before contacting the turf.
It also promotes a smoother transition from backswing to downswing, helping golfers develop more consistent ball striking.
Common Mistakes to Avoid
One common mistake is sliding your hips excessively toward the target instead of allowing a controlled pressure shift and body rotation. Too much lateral movement can create balance problems and inconsistent contact.
Another mistake is stepping forward too early or aggressively, which can disrupt your swing sequence.
Focus on smooth movements rather than forcing your body toward the target.
Pro Tip: Begin with 10 slow practice swings without a golf ball. Once you feel comfortable, introduce short iron shots and gradually increase your swing length. After developing the movement, return to your normal stance and recreate the same balanced pressure shift without physically stepping through.
By incorporating this drill into your practice routine, you can improve proper weight transfer, develop more efficient golf swing mechanics, and reduce the fat shots that prevent you from achieving consistent iron contact.
4. The Impact Bag Drill: Build a Stronger Golf Impact Position
The impact bag drill is an excellent training exercise for golfers who struggle with inconsistent iron contact, early club release, and poor hand positioning during the downswing. Developing a reliable golf impact position is essential for achieving cleaner shots, improving distance control, and reducing the frustrating fat shots that occur when your club strikes the ground before reaching the ball.
If you’re wondering how to fix fat golf shots fast, improving your impact fundamentals is an important place to start. An impact bag provides physical feedback that helps you recognize the relationship between your hands, club shaft, wrists, and body rotation at the moment of contact.
How to Perform the Impact Bag Drill
Follow these steps to improve your impact position and develop better ball-striking habits:
1. Position your impact bag: Place a golf impact training bag on a stable, level practice surface. Make sure it is designed for golf training and filled according to the manufacturer’s instructions.
2. Choose a short iron: Use an 8-iron or 9-iron and establish your normal golf stance, positioning the bag where the golf ball would typically be.
3. Start with slow-motion movements: Make a short backswing and slowly move the club toward the bag without attempting a full-speed strike.
4. Check your hand positioning: As the club reaches the bag, your hands should generally be slightly ahead of the clubhead, encouraging a controlled impact position.
5. Maintain proper wrist alignment: Keep your lead wrist relatively flat or slightly flexed rather than allowing it to collapse backward through impact.
6. Allow natural body rotation: Let your hips and torso rotate toward the target while maintaining balance and posture.
7. Repeat the movement: Perform 10–15 controlled repetitions, focusing on proper positioning rather than force.
Why This Drill Improves Ball-First Contact
The impact bag drill helps golfers understand how their hands, wrists, and body should work together through impact. When the club releases too early, the clubhead may pass the hands before reaching the golf ball, potentially moving the swing’s low point backward.
Practicing a more effective impact position can encourage ball first contact, improve clubface control, and reduce unnecessary ground contact.
However, avoid forcing excessive forward shaft lean. Too much shaft lean can reduce the club’s effective loft, create an overly steep angle of attack, and introduce additional contact problems.
Transitioning From Practice to Real Golf Shots
After completing your impact bag rehearsals, remove the bag and practice short iron shots using the same controlled movement.
Begin with half swings, concentrating on maintaining your wrist structure, transferring pressure toward your lead foot, and rotating naturally through impact.
Gradually progress to three-quarter and full swings as your contact improves.
Pro Tip: Record your swing from a face-on camera angle to compare your impact position during slow-motion rehearsals and actual golf shots. Look for balanced body positioning and a controlled release rather than trying to hold your hands unnaturally far ahead of the clubhead.
By practicing this drill consistently, you can develop better golf impact mechanics, improve your ability to strike the ball before the turf, and build the foundation for cleaner, more reliable iron shots.
5. The Feet-Together Drill: Improve Balance and Swing Consistency
Maintaining proper balance throughout your golf swing is essential for achieving clean contact, controlling your clubhead, and producing accurate iron shots. When golfers experience excessive body movement, unstable posture, or poor coordination during the downswing, their clubhead may strike the ground before reaching the ball. The feet-together drill is one of the simplest fat golf shot drills for improving stability, developing better golf swing mechanics, and building the foundation for consistent ball striking.
This exercise encourages golfers to make controlled swings while minimizing unnecessary lateral movement. By narrowing your stance, you’ll become more aware of your balance, body rotation, and swing tempo, making it easier to identify movements that contribute to fat shots.
How to Perform the Feet-Together Drill
Follow these steps to improve your swing stability and develop more reliable iron contact:
1. Choose a short iron: Begin with an 8-iron or 9-iron to make controlling your swing easier.
2. Position your feet close together: Stand with your feet approximately 2–4 inches apart, maintaining a comfortable and balanced posture.
3. Position the golf ball correctly: Place the ball near the center of your narrow stance, adjusting slightly as needed for comfortable iron contact.
4. Make a controlled half swing: Swing the club back to approximately waist height while maintaining your posture and avoiding excessive body movement.
5. Rotate naturally through impact: Allow your shoulders, hips, and arms to work together without forcing an aggressive weight shift.
6. Finish in balance: Complete your follow-through while keeping your body stable and your weight comfortably supported.
7. Repeat the exercise: Practice 10–15 controlled swings, focusing on clean contact rather than maximum distance.
Why This Drill Improves Golf Swing Mechanics
The feet-together drill helps golfers recognize unnecessary movement that can disrupt their swing sequence. With a narrow stance, excessive swaying or aggressive lower-body movements become more noticeable because maintaining balance becomes challenging.
By encouraging smoother body rotation and improved coordination, this exercise helps golfers develop a more repeatable swing motion.
Better balance also supports improved golf swing low point control, which is essential for striking the ball before the turf and producing consistent iron shots.
Common Mistakes to Avoid
One common mistake is attempting full-speed swings while maintaining a narrow stance. This can cause instability and make it difficult to control your clubhead.
Another mistake is keeping your body excessively rigid. Although stability is important, your hips and shoulders should still rotate naturally throughout the swing.
Avoid leaning backward during the downswing or lifting your upper body to prevent ground contact.
Transitioning Back to Your Normal Golf Stance
Once you consistently make clean contact with your feet close together, gradually widen your stance over several practice swings.
Start with a slightly wider stance, then progress toward your normal setup while maintaining the same smooth tempo and balanced rotation.
Pro Tip: Alternate five feet-together swings with five swings using your normal stance. This helps transfer the improved balance and coordination into your regular golf swing.
By practicing this drill consistently, you can improve your golf swing mechanics, reduce unnecessary body movement, and develop the stability needed for consistent ball striking and more reliable iron shots.
6. The Forward Ball Position Check Drill: Improve Your Setup
One of the most overlooked causes of fat golf shots is incorrect ball positioning during setup. Even golfers with solid swing mechanics can struggle with inconsistent iron contact when the golf ball is positioned too far forward or backward in their stance. The forward ball position check drill is one of the simplest golf fat shot fixes because it helps golfers identify setup mistakes that can interfere with their golf swing low point and prevent clean ball-first contact.
When the golf ball is positioned excessively far forward, your clubhead may reach the bottom of its swing arc before reaching the ball. As a result, the club can strike the turf prematurely, producing heavy contact, reduced distance, and inconsistent ball flight.
How to Perform the Forward Ball Position Check Drill
Follow these steps to evaluate your ball position and develop a more consistent setup:
1. Choose a mid-iron: Begin with a 7-iron or 8-iron to establish a comfortable reference point for your normal ball position.
2. Place an alignment stick on the ground: Position one alignment stick parallel to your intended target line to help maintain proper alignment.
3. Add a second alignment stick: Place another stick perpendicular to your target line, pointing toward the golf ball. This creates a visual reference for checking ball position.
4. Establish your normal stance: Set up naturally and observe where the ball sits relative to your feet.
5. Make controlled practice swings: Hit five golf balls while monitoring your contact quality, divot location, and ball flight.
6. Adjust your ball position gradually: If necessary, move the ball approximately half an inch toward the center of your stance and repeat the exercise.
7. Compare your results: Identify which position produces the cleanest contact and most consistent iron shots.
Understanding Ball Position for Different Golf Clubs
Proper ball positioning varies depending on the club you’re using.
-
Short irons and wedges: Generally played near the center of your stance to encourage a descending strike.
-
Mid-irons: Typically positioned around the center or slightly forward of center.
-
Long irons and hybrids: Usually positioned farther forward to accommodate their longer shafts and shallower approach angles.
These positions are general starting points rather than universal rules. Your stance width, swing characteristics, and individual setup may require slight adjustments.
Why Ball Position Affects Your Golf Swing Low Point
Your golf swing low point determines where the clubhead reaches its lowest position relative to the golf ball. When the ball is positioned too far forward, the club may contact the ground before reaching it.
Correcting your setup helps create a more favorable relationship between the ball and your swing arc, encouraging ball first contact and reducing unnecessary turf interaction.
Common Mistakes to Avoid
Avoid making dramatic ball-position changes after one poor shot. Fat contact can also result from improper weight transfer, early club release, or inconsistent posture.
Instead, make small adjustments and evaluate several shots before deciding whether a change is beneficial.
Pro Tip: Use the same alignment-stick setup during multiple practice sessions. Once you identify a reliable ball position for each iron, develop a consistent pre-shot routine to reproduce that setup on the golf course.
By improving your ball positioning and establishing repeatable setup fundamentals, you can reduce fat iron shots, improve contact consistency, and develop greater confidence with your irons.
7. The Half-Swing Contact Drill: Develop Clean Ball-First Contact
The half-swing contact drill is one of the best drills to fix fat golf shots because it helps golfers develop cleaner contact without the added complexity of a full golf swing. When you struggle with hitting the ground before the ball, shortening your swing allows you to focus on controlling your clubhead, maintaining proper posture, and improving your golf swing low point.
Many golfers attempt to correct fat shots by swinging harder or making dramatic mechanical adjustments. However, these changes can create additional problems. Practicing controlled half swings helps simplify your golf swing mechanics, making it easier to identify mistakes and develop the fundamentals needed for consistent ball striking.
How to Perform the Half-Swing Contact Drill
Follow these steps to improve your iron contact and develop a more reliable swing:
1. Choose a short iron: Begin with an 8-iron, 9-iron, or pitching wedge to make controlling your swing easier.
2. Establish your normal setup: Position the golf ball near the center of your stance, maintain balanced posture, and allow your arms to hang naturally.
3. Swing back to waist height: Make a controlled backswing until your hands reach approximately waist level, keeping your movements smooth and coordinated.
4. Transfer pressure toward your lead foot: As you begin the downswing, allow pressure to shift naturally toward your lead side while maintaining your posture.
5. Focus on ball-first contact: Strike the golf ball before the turf, allowing the clubhead to continue moving through impact.
6. Finish at waist height: Complete a controlled follow-through with your hands approximately waist high and your body balanced.
7. Repeat the exercise: Practice 10–15 shots while monitoring your contact quality, ball flight, and overall consistency.
How to Recognize Clean Ball-First Contact
One of the biggest advantages of this drill is the opportunity to evaluate your contact after every shot.
A clean iron strike typically produces a crisp impact sound, predictable ball flight, and controlled turf interaction. On grass, your divot should generally begin at or slightly ahead of the ball’s original position.
If your club strikes the ground behind the ball, you’ll often notice a heavier impact sound, reduced distance, and excessive turf contact.
These observations help you recognize the difference between clean strikes and fat shots.
Progressing From Half Swings to Full Swings
Once you consistently achieve ball first contact with half swings, gradually increase your swing length.
Begin with waist-high swings, progress to three-quarter swings, and eventually return to your normal full swing.
Avoid increasing your swing speed until you can maintain reliable contact at the previous stage.
Pro Tip: Practice sets of 10 shots and record how many produce clean contact. Aim for at least eight solid strikes before increasing your swing length. This provides a measurable goal while helping you avoid rushing your progress.
By incorporating the half-swing contact drill into your practice routine, you can develop better low-point control, improve your impact consistency, and build the confidence needed to strike your irons more cleanly throughout your golf game.
8. The Lead-Foot Pressure Drill: Stop Hitting Behind the Golf Ball
The lead-foot pressure drill is one of the most effective exercises for golfers who struggle with hitting behind the ball because they fail to transfer pressure correctly during the downswing. If you’re wondering how to stop hitting fat golf shots, learning to maintain appropriate pressure on your lead foot can help improve your golf swing low point, encourage cleaner contact, and develop more consistent iron shots.
When too much pressure remains on your trail foot during the downswing, your clubhead may reach the bottom of its swing arc behind the golf ball. This often results in heavy contact, reduced distance, and unpredictable ball flight. Developing proper weight transfer helps position your swing’s lowest point farther forward, increasing your chances of striking the ball before the turf.
How to Perform the Lead-Foot Pressure Drill
Follow these steps to improve your pressure transfer and develop cleaner iron contact:
1. Choose a short iron: Start with an 8-iron, 9-iron, or pitching wedge to make controlling your swing easier.
2. Establish your normal stance: Position the golf ball near the center of your stance and maintain a comfortable, athletic posture.
3. Shift slightly toward your lead foot: At address, distribute approximately 55–60% of your pressure toward your lead foot while keeping your upper body relatively centered.
4. Make a controlled backswing: Swing the club back to approximately waist height without allowing excessive lateral movement away from the target.
5. Maintain lead-side pressure: As you begin the downswing, feel pressure moving into your lead foot while allowing your hips and torso to rotate naturally.
6. Focus on ball-first contact: Strike the golf ball before the turf, maintaining a balanced posture throughout impact.
7. Finish in balance: Complete your follow-through with most of your pressure supported by your lead foot.
Why Lead-Foot Pressure Improves Your Golf Swing Low Point
Your golf swing low point is influenced by several factors, including body movement, pressure transfer, wrist mechanics, and club delivery.
When pressure shifts appropriately toward your lead foot, it can help position the swing arc farther forward, making it easier to achieve clean ball-first contact.
However, transferring pressure is not the same as leaning your entire upper body toward the target. Excessive forward leaning can create an overly steep swing and introduce additional contact problems.
Common Mistakes to Avoid
One common mistake is reverse weight transfer, where golfers move pressure toward their lead foot during the backswing but shift backward onto their trail foot during the downswing.
Another mistake is sliding the hips excessively toward the target without allowing proper body rotation.
Focus on a controlled pressure shift, balanced posture, and natural rotation rather than forcing your body forward.
Transitioning to Your Normal Golf Swing
Once you consistently strike the ball cleanly using short swings, gradually increase your backswing length.
Allow pressure to move naturally during the backswing, then transfer it toward your lead foot as you transition into the downswing.
Pro Tip: Practice 10 controlled half swings using slightly increased lead-foot pressure, followed by five swings with your normal setup. Compare your contact quality and focus on recreating the same balanced impact position.
With regular practice, this drill can improve proper weight transfer, reduce fat shots, and help you develop more reliable iron contact.
9. The Divot Control Drill: Build Consistent Ball Striking
The divot control drill is one of the most practical drills to fix fat golf shots fast because it provides visible feedback about where your clubhead contacts the ground. If you frequently hit behind the golf ball, learning to recognize and control your divot position can help improve your golf swing low point, develop cleaner iron contact, and achieve more consistent ball striking.
When hitting a well-struck iron shot from grass, the clubhead generally contacts the golf ball before entering the turf. This often produces a divot that begins slightly ahead of the ball’s original position. If your divot starts behind the ball, your club is likely contacting the ground too early, contributing to fat shots and reduced distance.
How to Perform the Divot Control Drill
Follow these steps to improve your turf interaction and develop greater consistency:
1. Choose a suitable practice area: Find a grass driving range or designated practice area where taking divots is permitted.
2. Create a reference point: Place a small tee level with the golf ball, several inches to the side and safely outside your swing path. Alternatively, use a marked line on the ground.
3. Position your golf ball: Set the ball directly beside your reference point and establish your normal iron stance.
4. Make controlled iron swings: Begin with half swings, focusing on striking the golf ball before the clubhead contacts the turf.
5. Examine your divot: After each shot, check where the divot begins relative to the ball’s original position.
6. Evaluate your contact: If the divot begins behind the ball, your swing’s low point may be too far back.
7. Repeat and refine: Practice 10–15 shots while monitoring your divot location, contact quality, and ball flight.
Why Divot Position Matters for Consistent Ball Striking
Your divot provides useful information about how your clubhead interacts with the ground during impact.
When the club strikes the ball before the turf, more of its energy is delivered directly into the golf ball, helping produce cleaner contact and more predictable distances.
However, divot depth and shape can vary depending on your club selection, swing characteristics, turf conditions, and angle of attack.
For example, a pitching wedge may produce a more noticeable divot than a long iron. Some golfers also make excellent ball-first contact while taking very shallow divots.
Common Mistakes to Avoid
One common mistake is deliberately digging the clubhead into the ground to create a larger divot. Excessively steep swings can reduce consistency and create additional contact problems.
Another mistake is focusing exclusively on divot appearance without evaluating ball flight and impact quality.
Instead, concentrate on making clean contact while allowing the club to interact naturally with the turf.
How to Track Your Improvement
During each practice session, record how many shots produce clean contact with the turf disturbance beginning at or ahead of the ball’s original position.
Compare your results over several sessions to identify improvements in consistency.
Pro Tip: Practice sets of 10 iron shots and aim for eight clean strikes before increasing your swing speed. Track your ball flight, impact sound, and divot position together rather than relying on one measurement.
By incorporating the divot control drill into your practice routine, you can develop better low-point awareness, improve your iron contact, and eliminate common swing mistakes responsible for fat shots. Combined with the other golf fat shot fixes in this guide, this exercise can help you build the foundation for cleaner, more accurate, and more consistent ball striking.
How to Practice These Fat Golf Shot Drills for Faster Improvement
Learning the best drills to fix fat golf shots is only the beginning. To achieve lasting improvements, golfers must develop a consistent practice routine that focuses on proper technique, controlled movements, and measurable progress. Practicing with a clear purpose can help you improve your golf swing low point, develop cleaner ball-first contact, and eliminate common mistakes that contribute to heavy iron shots.
Start With Short, Controlled Swings
One of the most effective ways to improve your iron contact is to begin with short, controlled swings rather than immediately attempting full-speed shots.
Half swings allow you to concentrate on maintaining proper posture, controlling your clubhead, and achieving clean contact without worrying about maximum distance.
As your consistency improves, gradually increase your swing length and speed while maintaining the same fundamental movements.
Focus on One Golf Swing Problem at a Time
Not every golfer hits fat shots for the same reason. Some struggle with poor weight transfer, while others experience inconsistent low-point control, early club release, or incorrect ball positioning.
Before selecting your practice drills, identify which problem contributes most to your inconsistent contact.
For example, if your pressure remains on your trail foot during the downswing, prioritize the lead-foot pressure drill. If your club consistently strikes the ground behind the ball, practice the towel drill or line-in-the-sand drill.
Use a Simple 15-Minute Practice Routine
You don’t need hours at the driving range to practice effectively. Try this structured routine:
-
Minutes 1–5: Low-point control. Practice the towel drill or line drill to improve your ability to strike the ball before the turf.
-
Minutes 6–10: Pressure transfer and impact. Use the step-through drill or lead-foot pressure drill to develop better downswing mechanics.
-
Minutes 11–15: Ball-striking practice. Hit controlled iron shots while monitoring contact quality, balance, and ball flight.
Track Your Ball-Striking Progress
Tracking your results helps determine whether your practice routine is producing meaningful improvements.
Record how many shots out of ten produce clean contact, predictable distance, and controlled turf interaction.
Pro Tip: Keep a simple practice journal and compare your results weekly. Focus on improving your percentage of solid strikes rather than measuring success exclusively by distance.
By following a structured routine and practicing consistently, you can develop better golf swing mechanics, reduce fat shots, and build confidence through consistent ball striking.
Common Mistakes to Avoid When Trying to Fix Fat Golf Shots
Even when practicing effective drills to fix fat golf shots fast, certain swing habits can prevent golfers from making meaningful improvements. Understanding these common mistakes is essential for developing cleaner iron contact, improving your golf swing mechanics, and building greater consistency throughout your game.
Many golfers unknowingly repeat the same errors because they focus on hitting the ball farther instead of improving their impact fundamentals.
Trying to Lift the Golf Ball Into the Air
One of the most common mistakes amateur golfers make is attempting to scoop the golf ball into the air.
Instead of allowing the club’s loft to launch the ball naturally, golfers may lean backward, flip their wrists, or release the clubhead too early.
These movements can shift the golf swing low point behind the ball, increasing the likelihood of fat or thin shots.
Focus on making clean ball-first contact while allowing the club’s loft to produce the desired trajectory.
Keeping Too Much Weight on the Back Foot
Failing to transfer pressure toward your lead foot during the downswing can contribute to inconsistent contact.
When too much pressure remains on your trail foot, your clubhead may strike the turf before reaching the ball.
Practicing proper weight transfer through controlled drills can help position your swing’s lowest point farther forward.
Remember that effective pressure transfer involves balanced movement and body rotation rather than excessive lateral sliding.
Swinging Too Hard Before Fixing Contact
Many golfers attempt to compensate for poor iron contact by increasing their swing speed.
Unfortunately, swinging harder often exaggerates existing timing problems and makes controlling the clubhead more difficult.
Start with half swings and focus on clean contact before gradually increasing your speed.
A controlled swing that produces solid impact is generally more effective than an aggressive swing that consistently strikes the ground first.
Changing Too Many Golf Swing Mechanics at Once
Trying to correct your grip, stance, ball position, weight transfer, and impact position simultaneously can make improvement unnecessarily complicated.
Instead, identify one specific problem and select a drill that directly addresses it.
Practice the movement consistently, evaluate your results, and introduce additional adjustments only when necessary.
Pro Tip: Record your golf swing from face-on and down-the-line camera angles to help identify recurring mistakes. If you’re unsure what’s causing your fat shots, consider getting feedback from a qualified golf instructor.
By avoiding these common mistakes and concentrating on targeted improvements, you can develop cleaner contact, more reliable iron shots, and greater confidence in your golf swing.
Frequently Asked Questions About Drills to Fix Fat Golf Shots Fast
Understanding why fat golf shots occur is essential for developing cleaner iron contact and improving your overall golf performance. Below are answers to common questions about the best drills to fix fat golf shots, proper swing mechanics, and achieving consistent ball striking.
What Is the Fastest Way to Fix Fat Golf Shots?
The fastest way to improve fat golf shots is to identify the underlying cause and practice exercises that directly address the problem. Poor low-point control, incorrect weight transfer, and early club release are common contributors.
Start with the towel drill or line-in-the-sand drill to identify where your clubhead contacts the ground. Practice short, controlled swings while focusing on striking the golf ball before the turf. Consistent repetition and immediate feedback can help you improve contact without making unnecessary swing changes.
What Are the Best Drills to Fix Fat Golf Shots?
Some of the best drills to fix fat golf shots include the towel drill, line-in-the-sand drill, and half-swing contact drill.
The towel drill helps golfers recognize when their club strikes the ground too early. The line drill improves awareness of the golf swing low point, while the half-swing drill encourages controlled movements and cleaner contact.
Combining these exercises with proper weight transfer can help develop more reliable iron shots.
Why Do I Keep Hitting the Ground Before the Golf Ball?
Hitting the ground before the golf ball usually occurs when your swing reaches its lowest point too early.
Common causes include excessive pressure on your trail foot, incorrect ball positioning, early wrist release, and inconsistent body movement.
Improving your golf impact position and practicing low-point control can help reduce these mistakes and encourage cleaner ball-first contact.
How Can I Stop Hitting Fat Golf Shots With My Irons?
To stop hitting fat iron shots, begin by checking your setup, ball position, and pressure distribution.
Position the ball appropriately for your club, maintain balanced posture, and allow pressure to shift toward your lead foot during the downswing.
Practice half swings while focusing on striking the ball before the turf. Gradually increase your swing speed as your contact becomes more consistent.
Does Ball Position Cause Fat Golf Shots?
Yes, incorrect ball positioning can contribute to fat golf shots.
When the ball is positioned too far forward relative to your swing’s lowest point, the clubhead may strike the turf before reaching it.
However, ball position is only one factor. Poor pressure transfer, early release, and inconsistent posture can also cause heavy contact.
Use alignment sticks to evaluate your setup and make small adjustments when necessary.
How Long Does It Take to Stop Hitting Fat Golf Shots?
Improvement depends on your current swing mechanics, practice frequency, and ability to identify the underlying problem.
Some golfers notice cleaner contact during their first practice session, while others may need several weeks of focused training to develop more consistent results.
Practicing drills to fix fat golf shots fast for 10–15 minutes per session can help reinforce better movement patterns.
Focus on gradual improvement, track your percentage of solid strikes, and prioritize consistent ball-first contact over immediate distance gains.
Conclusion: Use These Drills to Fix Fat Golf Shots Fast and Improve Your Game
Hitting fat golf shots can be frustrating, especially when poor contact costs you valuable distance, accuracy, and confidence on the golf course. Fortunately, improving your iron striking doesn’t require completely rebuilding your swing. By practicing these nine powerful drills to fix fat golf shots fast, you can identify common swing mistakes, develop better fundamentals, and achieve more consistent ball striking.
From the towel drill and line-in-the-sand drill to the step-through, impact bag, and divot control exercises, each technique targets a specific aspect of your golf swing. These drills help improve your golf swing low point, encourage proper weight transfer, strengthen your impact position, and develop the ball-first contact needed for cleaner iron shots.
Remember, lasting improvement comes from consistent, purposeful practice rather than expecting perfect results overnight. Start with short, controlled swings, concentrate on one problem at a time, and gradually increase your swing speed as your contact improves.
Developing reliable ball-first contact allows your clubhead to transfer energy more efficiently into the golf ball, helping produce more predictable distances, improved accuracy, and greater confidence with your irons.
Whether you’re a beginner learning how to stop hitting fat golf shots or an experienced golfer looking to sharpen your ball-striking skills, these practical exercises can help you build a more dependable golf swing.
Ready to stop hitting behind the ball and start striking your irons with confidence? Choose two or three drills from this guide, dedicate 15 minutes to focused practice, and begin building the consistent, powerful iron contact your golf game deserves!