
Best Drill to Stop Hitting Fat Golf Shots: 7 Expert Tips
Best Drills to Stop Hitting Fat Golf Shots With Irons
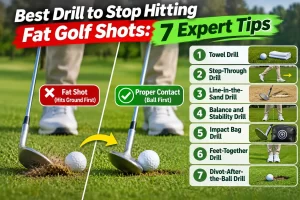
Introduction: Why You Keep Hitting Fat Golf Shots
Few things are more frustrating in golf than making what feels like a solid swing, only to watch your golf club strike the ground before reaching the ball. Instead of producing a clean, powerful iron shot, the club digs into the turf, loses speed, and sends the golf ball traveling a disappointing distance. Fortunately, practicing the right best drill to stop hitting fat golf shots can help you develop cleaner contact, improve consistency, and regain confidence in your iron game.
A fat golf shot occurs when the clubhead contacts the ground behind the golf ball before impact. This premature ground contact reduces clubhead speed and disrupts energy transfer, often resulting in shorter shots, unpredictable ball flight, and poor distance control. For golfers who repeatedly struggle with fat iron shots, these mistakes can quickly turn promising rounds into frustrating experiences.
One of the most important factors behind consistent ball striking is controlling the low point of your golf swing. The low point is the lowest position the clubhead reaches during its swing arc. With a properly executed iron shot, the club should contact the golf ball before reaching its lowest point, allowing the clubhead to brush or strike the turf afterward.
Several common swing faults can interfere with this process, including improper weight transfer, poor balance, early club release, and inconsistent golf impact position. However, correcting these problems doesn’t necessarily require rebuilding your entire golf swing.
By practicing targeted fat golf shot drills, you can improve your golf swing mechanics, develop better low-point control, and learn how to produce a more reliable descending iron strike.
Throughout this guide, you’ll discover seven expert techniques, including the towel drill, step-through drill, line-in-the-sand drill, balance and stability drill, impact bag drill, feet-together drill, and divot-after-the-ball drill.
Each exercise focuses on a specific element of your swing, helping you identify common mistakes and develop practical golf fat shot fixes that lead to cleaner contact, improved distance control, and more consistent iron shots.
The goal is simple: strike the golf ball first, control where your club contacts the ground, and start hitting more confident iron shots.
1. Master the Towel Drill for Ball-First Contact
One of the most effective drills to stop hitting fat golf shots is the towel drill. This simple training exercise helps golfers develop better low-point control, improve their golf impact position, and learn how to strike the golf ball before contacting the ground. Whether you’re a beginner or an experienced golfer struggling with inconsistent iron shots, the towel drill provides immediate feedback about your clubhead’s path through impact.
Unlike complicated swing adjustments, this exercise requires nothing more than a golf towel, a golf ball, and a short iron. With consistent practice, you can develop the awareness needed for cleaner contact and more reliable iron shots.
How to Set Up the Towel Drill
The towel drill is easy to perform at a driving range or designated golf practice area. Follow these steps:
-
Position the towel: Fold a small golf towel and place it approximately 4–6 inches behind the golf ball, directly along your target line.
-
Choose a short iron: Start with a pitching wedge or 9-iron, which generally provides better control during practice.
-
Establish your setup: Position the ball appropriately for your selected club, maintain balanced posture, and allow your arms to hang naturally.
-
Make controlled half swings: Focus on striking the golf ball cleanly without contacting the towel.
-
Evaluate your contact: If your club catches the towel, your swing may be bottoming out too early.
Begin with slow, controlled swings before gradually increasing your swing length and speed.
Why the Towel Drill Improves Your Impact Position
The towel drill is considered one of the best golf drills for ball-first contact because it provides immediate feedback about your swing’s low point.
When your clubhead strikes the towel before reaching the golf ball, it indicates that your club is traveling too low behind the ball. This often results from hanging back on your trail foot, releasing the club too early, or allowing your upper body to move excessively during the downswing.
Practicing this exercise encourages proper weight transfer, improved clubhead delivery, and a more consistent descending iron strike.
As your golf swing mechanics improve, you’ll develop a better understanding of how the club should approach the ball and continue toward the turf after impact.
Common Towel Drill Mistakes to Avoid
Although the towel drill is simple, several mistakes can reduce its effectiveness.
Swinging too aggressively: Trying to generate maximum clubhead speed can disrupt your balance and make clean contact more difficult. Start slowly and prioritize accuracy.
Trying to lift the golf ball: Scooping the ball into the air can encourage an early release and inconsistent contact. Allow the club’s loft to launch the ball naturally.
Moving the towel too close: Positioning the towel immediately behind the ball before developing consistent contact can make the exercise unnecessarily difficult.
For golfers learning how to stop hitting fat golf shots with irons, practicing the towel drill for 10–15 controlled repetitions can be a useful starting point. Focus on consistent contact rather than perfect results, and gradually increase the difficulty as your confidence improves.
2. Improve Proper Weight Transfer With the Step-Through Drill
Proper weight transfer is essential for producing clean iron shots and preventing the frustrating problem of hitting the ground before the golf ball. When golfers fail to shift pressure toward their lead foot during the downswing, the clubhead often reaches its lowest point too early, resulting in fat shots, reduced distance, and inconsistent contact. Fortunately, the step-through drill is one of the most practical drills to stop hitting fat golf shots because it teaches your body how to move naturally toward the target while maintaining balance and control.
This exercise helps golfers improve their swing sequencing, develop better lower-body movement, and establish a more consistent golf impact position without making complicated technical adjustments.
How to Perform the Step-Through Golf Drill
The step-through drill encourages proper pressure transfer by incorporating a natural stepping motion into your golf swing.
Follow these steps to practice the exercise correctly:
-
Establish your starting position: Address the golf ball with your feet relatively close together, maintaining balanced posture and a comfortable grip.
-
Begin a controlled backswing: Rotate your shoulders naturally while allowing pressure to move toward your trail foot.
-
Step toward the target: As your backswing finishes and the downswing begins, step toward the target with your lead foot.
-
Complete your downswing: Allow your hips and torso to rotate through impact while keeping your movements smooth and coordinated.
-
Finish in balance: Complete your swing with most of your pressure supported by your lead foot.
Start with slow practice swings without a golf ball. Once the movement feels comfortable, introduce short iron shots at reduced speed.
How Weight Transfer Prevents Fat Golf Shots
One of the most common causes of fat iron shots is failing to transfer pressure toward the lead foot before impact.
When golfers hang back on their trail foot, the bottom of the swing arc can remain behind the golf ball. Consequently, the clubhead strikes the turf prematurely instead of producing a clean, descending iron strike.
The step-through drill encourages your lower body to initiate the transition while helping your upper body and arms follow in the proper sequence.
As pressure shifts toward your lead side, the swing’s low point can move forward, improving your chances of striking the golf ball before contacting the ground.
This coordinated movement supports consistent ball striking, better distance control, and more reliable golf swing mechanics.
Common Weight Transfer Mistakes
Although the step-through drill is effective, avoid these common mistakes:
Excessive lateral sliding: Moving your hips too far toward the target can disrupt rotation and create inconsistent contact. Focus on a controlled pressure shift rather than an exaggerated sideways movement.
Losing balance during the downswing: Stepping too aggressively can cause instability. Practice slowly until your movements become coordinated.
Confusing pressure transfer with upper-body movement: Proper weight transfer doesn’t require throwing your shoulders or upper body toward the target. Allow your lower body to shift pressure while maintaining controlled rotation.
Among the most useful fat golf shot drills, the step-through exercise helps golfers develop a smoother transition and more dependable impact position. With consistent practice, you’ll build the movement patterns needed for cleaner iron contact and improved confidence on the golf course.
What if your fat golf shots aren’t caused by the mistake you think you’re making? Many golfers spend hours adjusting their grip, stance, or swing speed without identifying the real reason their club strikes the ground too early. Finding the best drill to stop hitting fat golf shots starts with understanding what’s happening during your swing. Discover the common mistakes that may be holding you back inside The Golf Swing Lab
3. Use the Line-in-the-Sand Drill to Control Your Swing Low Point
Learning to control the lowest point of your golf swing is one of the most important skills for eliminating fat iron shots. When your clubhead strikes the ground before reaching the golf ball, you lose valuable clubhead speed, distance, and consistency. Fortunately, the line-in-the-sand drill is one of the most effective drills to stop hitting fat golf shots because it provides immediate visual feedback about where your club contacts the ground.
This simple exercise helps golfers understand their swing arc, improve their golf impact position, and develop the proper descending iron strike needed for cleaner ball-first contact.
How to Practice the Line-in-the-Sand Drill
The line-in-the-sand drill can be performed in a designated practice bunker or another suitable sandy practice area where full swings are permitted.
Follow these steps to improve your low-point control:
-
Draw a straight line: Use your golf club to draw a line in the sand perpendicular to your intended target line.
-
Establish your setup: Take your normal iron stance, positioning the line where the golf ball would ordinarily be located.
-
Position your clubhead: Place the clubhead just behind the line while maintaining balanced posture.
-
Make controlled practice swings: Without using a golf ball, swing your club smoothly while attempting to contact the sand on the target side of the line.
-
Evaluate your results: Examine where your club first contacts the sand. If the mark begins behind the line, your swing is bottoming out too early.
Repeat the exercise until you consistently brush the sand beyond the line without making exaggerated swing adjustments.
Why Low-Point Control Matters for Iron Shots
The low point is the lowest position your clubhead reaches during the golf swing. For a properly executed iron shot, the club should contact the golf ball before reaching the bottom of its swing arc.
When your low point occurs behind the golf ball, the clubhead strikes the turf prematurely, producing the heavy contact associated with fat shots.
Several golf swing mechanics can influence low-point control, including improper weight transfer, excessive upper-body movement, early wrist release, and inconsistent posture.
The line-in-the-sand drill helps you recognize these problems by showing exactly where your club contacts the ground.
As your awareness improves, you’ll become better equipped to produce consistent ball striking, maintain a reliable golf impact position, and avoid unnecessary distance loss.
Progressing From Practice Swings to Real Golf Shots
Begin with short, controlled swings using a pitching wedge or 9-iron. Focus on brushing the sand just beyond the line rather than swinging aggressively.
Once you can consistently control your contact point, gradually progress to half swings and three-quarter swings while maintaining balance and rhythm.
Next, transfer the exercise to a designated grass practice area. Where permitted, create a visible reference line using a suitable practice marker or turf-safe marking method.
Position a golf ball on the line and practice striking the ball before contacting the ground on the target side.
Among the best golf fat shot fixes, this drill develops the awareness necessary to control your swing’s low point and produce cleaner, more predictable iron shots.
4. Fix Your Golf Posture With the Balance and Stability Drill
Maintaining proper golf posture and balance is essential for producing clean iron shots and avoiding frustrating fat golf shots. When your body moves excessively during the swing, the clubhead can reach the ground too early, resulting in poor contact, reduced distance, and inconsistent ball flight. Fortunately, the balance and stability drill is one of the most practical drills to stop hitting fat golf shots because it helps golfers establish a reliable setup and maintain better control throughout their swing.
By improving your posture, lower-body stability, and overall balance, you can develop more consistent golf swing mechanics without making major changes to your natural swing.
How to Establish a Balanced Golf Setup
A balanced golf setup creates the foundation for consistent ball striking and improved low-point control.
Follow these steps to establish proper posture:
-
Position your feet correctly: Stand with your feet approximately shoulder-width apart when using a mid-iron, adjusting slightly for comfort and stability.
-
Bend from your hips: Tilt your upper body forward naturally while maintaining a comfortable spine angle and avoiding excessive rounding of your back.
-
Flex your knees slightly: Maintain a relaxed knee bend that supports athletic movement without lowering your body unnecessarily.
-
Distribute pressure evenly: Keep your pressure centered through the middle of your feet rather than leaning excessively toward your toes or heels.
-
Relax your arms: Allow your arms to hang naturally beneath your shoulders while maintaining a comfortable grip.
This balanced starting position helps create a more predictable swing arc and improves your ability to control where the club contacts the ground.
How Poor Balance Causes Fat Golf Shots
Poor balance can significantly affect your golf impact position and contribute to inconsistent iron contact.
When golfers move excessively toward the golf ball during the downswing, their posture can change, causing the clubhead to travel too deeply into the turf. Conversely, moving excessively away from the ball can disrupt the swing arc and produce unpredictable contact.
Excessive knee bending can also create problems by lowering your body too much at address, making it more difficult to maintain consistent posture throughout the swing.
These movements interfere with low-point control and can contribute to fat shots, thin shots, and inconsistent distance.
Developing better stability allows your body to rotate more efficiently while maintaining the spacing necessary for a reliable descending iron strike.
Practice Maintaining Stability Throughout Your Swing
Begin the balance and stability drill with slow-motion practice swings using a short iron.
Focus on maintaining comfortable posture while allowing your shoulders, hips, and arms to rotate naturally. Avoid locking your knees or attempting to keep your head completely motionless.
Gradually increase your swing speed while monitoring your balance and ground contact.
At the finish, most of your pressure should be supported by your lead foot, with your body facing the target.
Among the most useful fat golf shot drills, this exercise helps golfers improve stability, develop consistent ball striking, and reduce unnecessary movements that contribute to poor iron contact.
5. Develop Forward Shaft Lean With the Impact Bag Drill
Developing proper forward shaft lean is an important part of producing clean, powerful iron shots. When golfers release their wrists too early during the downswing, the clubhead can pass their hands before impact, causing the swing’s low point to shift behind the golf ball. This often results in fat shots, inconsistent distance, and poor ball striking. Fortunately, the impact bag drill is one of the most useful drills to stop hitting fat golf shots because it helps golfers understand proper hand positioning and develop a more controlled golf impact position.
By practicing this exercise, you can improve your awareness of forward shaft lean, develop better clubhead control, and establish the impact conditions needed for more consistent iron contact.
How to Use an Impact Bag Correctly
An impact bag is a golf training aid designed to help golfers rehearse their impact position without making full-speed swings.
Follow these steps to practice the drill correctly:
-
Position the impact bag: Place a purpose-built golf impact bag on a stable surface directly in front of your clubhead.
-
Establish your setup: Take your normal iron stance with balanced posture and a comfortable grip.
-
Make a short backswing: Move the club back slowly, keeping your arms and body coordinated.
-
Rehearse your impact position: Rotate gently toward the target while allowing your hands to move slightly ahead of the clubhead.
-
Make controlled contact: Allow the clubhead to meet the bag lightly without forcefully striking or pushing into it.
Repeat the movement slowly, focusing on maintaining balance and proper body rotation rather than generating power.
Why Forward Shaft Lean Helps Prevent Fat Shots
Forward shaft lean occurs when the club’s grip end is positioned slightly closer to the target than the clubhead at impact.
For many conventional iron shots, this position supports a descending iron strike and helps golfers contact the ball before the turf.
However, when golfers release the club too early, the clubhead may overtake their hands before reaching the ball. This movement, commonly called early casting, can shift the swing’s low point backward and increase the likelihood of fat contact.
A relatively stable lead wrist, combined with proper weight transfer and body rotation, helps golfers deliver the club more consistently.
The impact bag drill develops awareness of these movements, making it a valuable addition to your collection of golf fat shot fixes.
Avoid These Common Impact Position Mistakes
Exaggerating forward shaft lean: Pushing your hands excessively forward can reduce effective loft, interfere with the club’s bounce, and create poor contact.
Driving your hands too far ahead: Proper shaft lean develops through coordinated movement rather than forcing your hands toward the target.
Ignoring swing sequencing: An impact bag cannot replace proper pressure transfer, rotation, and timing throughout the downswing.
For golfers learning how to stop hitting fat golf shots with irons, this drill provides a practical way to understand proper impact mechanics. Practice controlled repetitions, then transfer the same balanced movements into short iron shots to develop cleaner contact and more predictable ball flight.
How many strokes are fat iron shots costing you every round? One heavy shot can leave you short of the green, while repeated mistakes can undermine your confidence with every iron in your bag. Without addressing the underlying swing mechanics, the frustration may continue. Discover practical golf swing instruction designed to help you improve contact, distance control, and consistency with The Golf Swing Lab
6. Improve Golf Swing Mechanics With the Feet-Together Drill
Developing smooth, coordinated golf swing mechanics is essential for producing consistent iron shots and avoiding unnecessary ground contact. When golfers rush their downswing or lose balance during the transition, the clubhead can reach the ground before the golf ball, resulting in fat shots and unpredictable ball flight. The feet-together drill is one of the simplest drills to stop hitting fat golf shots because it encourages better balance, controlled swing tempo, and improved coordination between your upper and lower body.
This exercise helps golfers recognize unnecessary movement while developing a more repeatable swing that supports consistent ball striking.
How to Perform the Feet-Together Drill
The feet-together drill reduces your normal stance width, encouraging you to maintain balance throughout the golf swing.
Follow these steps to practice the exercise:
-
Position your feet close together: Stand with your feet nearly touching or separated by only a few inches.
-
Choose a short iron: Begin with a pitching wedge or 9-iron to make controlled swings easier.
-
Establish balanced posture: Bend naturally from your hips, maintain slight knee flex, and distribute pressure comfortably through your feet.
-
Make a short backswing: Rotate your shoulders smoothly while keeping your movements controlled.
-
Swing through naturally: Allow your arms and body to work together without rushing the transition.
-
Maintain your balance: Finish each swing without stepping, stumbling, or falling backward.
Begin with practice swings before introducing golf balls. Use reduced swing speed until you can maintain balance consistently.
How Better Swing Tempo Improves Ball Striking
One common reason golfers struggle with fat iron shots is poor swing sequencing caused by an overly aggressive transition.
When the downswing begins too abruptly, the arms, shoulders, and lower body may move out of sequence. This can disrupt the club’s swing arc and make controlling the low point more difficult.
The feet-together drill encourages smoother movement because excessive body motion makes it harder to maintain balance.
By developing a more controlled rhythm, golfers can improve their ability to deliver the clubhead consistently through impact.
Better balance also supports proper weight transfer, improved clubface control, and more reliable contact.
However, tempo alone does not guarantee ball-first contact. Golfers must also maintain appropriate pressure movement and low-point control.
Transfer Better Tempo Into Your Normal Golf Swing
Once you can perform the drill comfortably, gradually widen your stance toward your normal setup position.
Begin with half swings, maintaining the same smooth rhythm developed during the feet-together exercise.
Next, progress to three-quarter swings while focusing on balance, coordinated rotation, and consistent contact.
Avoid immediately returning to maximum swing speed, as this can reintroduce unnecessary tension and poor sequencing.
Among the best drills to stop hitting fat golf shots, the feet-together drill is particularly helpful for golfers who struggle with balance and inconsistent swing tempo.
With regular practice, you can develop smoother golf swing mechanics, improve your impact consistency, and build greater confidence when striking your irons.
7. Practice the Divot-After-the-Ball Drill for Consistent Iron Contact
One of the clearest signs of a properly executed iron shot is where your golf club contacts the turf in relation to the golf ball. When the clubhead strikes the ground behind the ball, it loses valuable speed and produces the heavy contact associated with fat golf shots. The divot-after-the-ball drill is one of the most effective drills to stop hitting fat golf shots because it teaches golfers to control their swing’s low point and develop a more reliable descending iron strike.
This exercise provides valuable feedback about your golf impact position while helping you improve consistent ball striking without making complicated swing adjustments.
How to Set Up the Divot-After-the-Ball Drill
The divot-after-the-ball drill is best practiced on a designated grass driving range or suitable practice area where taking divots is permitted.
Follow these steps to develop cleaner iron contact:
-
Position your golf ball: Place a ball on the grass and establish your normal setup using a pitching wedge or short iron.
-
Identify your target spot: Select a point approximately 1–2 inches beyond the golf ball, directly along your intended target line.
-
Establish balanced posture: Maintain comfortable knee flex, proper ball position, and balanced pressure through your feet.
-
Make a controlled swing: Swing smoothly while focusing on contacting the golf ball before the clubhead reaches the turf.
-
Evaluate your divot: Examine where the club first contacted the ground in relation to the ball’s original position.
Repeat the exercise while prioritizing clean contact rather than maximum distance.
Why Divot Location Reveals Your Impact Quality
Divot location provides useful information about your swing’s low point and overall impact consistency.
During a properly executed iron shot, the clubhead generally contacts the golf ball before reaching the lowest portion of its swing arc. When the club brushes or enters the turf afterward, the resulting divot typically begins on the target side of the ball’s original position.
However, when a divot begins behind the golf ball, it often indicates that the clubhead reached the ground too early.
This can result from improper weight transfer, excessive upper-body movement, early wrist release, or inconsistent golf swing mechanics.
Importantly, a deep divot is not necessary for successful iron contact. Many golfers produce excellent shots with shallow divots or minimal turf disturbance.
The objective is controlling where the club contacts the ground, not digging aggressively into the turf.
How to Develop Consistent Ball-First Contact
Begin practicing with a pitching wedge or 9-iron, using controlled half swings to develop awareness of your impact position.
Focus on striking the golf ball cleanly while allowing the clubhead to continue naturally toward the turf beyond its original position.
Once your contact becomes consistent, gradually increase your swing length and clubhead speed without sacrificing balance or rhythm.
Avoid forcing the club downward, as excessive steepness can create deeper divots and additional contact problems.
Among the most practical golf fat shot fixes, the divot-after-the-ball drill helps golfers recognize poor ground contact and develop more predictable iron shots.
With consistent practice, you’ll improve your low-point control, develop a more dependable golf impact position, and gain the confidence needed to strike cleaner, more accurate iron shots on the golf course.
Common Mistakes That Cause Fat Golf Shots
Understanding why fat golf shots occur is essential for developing cleaner iron contact and improving your overall golf swing consistency. Although poor contact can result from several swing faults, most fat shots happen when the clubhead reaches the ground before striking the golf ball. Identifying these mistakes allows you to select the most effective drills to stop hitting fat golf shots and develop better low-point control.
Hanging Back on Your Trail Foot
One of the most common causes of fat iron shots is failing to transfer pressure toward your lead foot during the downswing. When too much pressure remains on your trail foot, the bottom of your swing arc can stay behind the golf ball, causing premature ground contact.
Recommended fix: Practice the step-through drill to encourage proper weight transfer, improve swing sequencing, and move your low point forward for cleaner iron contact.
Releasing the Golf Club Too Early
Early release, commonly called casting, occurs when golfers straighten their wrists too soon during the downswing. This can cause the clubhead to overtake the hands prematurely, moving the swing’s low point backward and producing inconsistent contact.
Recommended fix: Use the impact bag drill to develop awareness of forward shaft lean, improve your golf impact position, and encourage more controlled clubhead delivery.
Incorrect Ball Position at Address
Positioning the golf ball too far forward in your stance can make it difficult to achieve consistent ball-first contact. The club may reach the bottom of its swing arc before arriving at the ball, resulting in fat or thin shots.
Recommended fix: Combine proper ball positioning with the towel drill to identify early ground contact and develop a more reliable descending iron strike.
Excessive Lower Body Movement
Excessive hip sliding, unstable knees, or unnecessary changes in body height can disrupt your golf swing mechanics. These movements make controlling the clubhead’s low point more difficult and contribute to inconsistent iron shots.
Recommended fix: Practice the balance and stability drill alongside the feet-together drill to improve posture, coordination, and consistent ball striking.
Trying to Scoop the Golf Ball Into the Air
Many recreational golfers mistakenly attempt to lift the golf ball by flipping their wrists or leaning backward through impact. This often causes the clubhead to bottom out too early.
Recommended fix: Use the line-in-the-sand drill and divot-after-the-ball drill to develop proper low-point control and learn to strike the ball before the ground.
By recognizing these common mistakes and practicing targeted fat golf shot drills, you can improve your impact consistency, reduce unnecessary ground contact, and develop more dependable iron shots.
Final Thoughts: Best Drill To Stop Hitting Fat Golf Shots and Build a More Consistent Golf Swing
Learning how to stop hitting fat golf shots doesn’t require completely rebuilding your golf swing. In many cases, improving your balance, weight transfer, swing mechanics, and low-point control can make a significant difference in your iron contact. By consistently practicing the right drills to stop hitting fat golf shots, you can develop cleaner ball striking, improve distance control, and approach every iron shot with greater confidence.
Throughout this guide, we’ve explored seven practical exercises designed to address the most common causes of fat golf shots:
-
Towel Drill: Develop better low-point control and learn to strike the golf ball before the ground.
-
Step-Through Drill: Improve proper weight transfer and encourage a more effective downswing sequence.
-
Line-in-the-Sand Drill: Identify where your club contacts the ground and improve swing arc consistency.
-
Balance and Stability Drill: Maintain better posture and reduce unnecessary body movement.
-
Impact Bag Drill: Develop awareness of forward shaft lean and a more controlled golf impact position.
-
Feet-Together Drill: Improve swing tempo, coordination, and overall balance.
-
Divot-After-the-Ball Drill: Practice producing a descending iron strike with more predictable ground contact.
Remember, the secret to consistent ball striking isn’t practicing every drill simultaneously. Instead, identify one or two areas of your swing that need improvement and focus on those exercises during your practice sessions.
For example, if you frequently hang back on your trail foot, begin with the step-through drill. If your club consistently strikes the turf behind the ball, prioritize the towel drill or line-in-the-sand drill.
Consistent, purposeful practice helps reinforce better movement patterns and develop more dependable iron contact over time.
Take Your Golf Swing Improvement to the Next Level
Eliminating fat golf shots is an important step toward becoming a more consistent golfer, but improving your overall swing requires understanding how every movement works together.
That’s where The Golf Swing Lab can help. Discover additional golf swing instruction, practical training techniques, and strategies designed to help you recognize common mistakes and build a more reliable golf swing.
Ready to stop wasting strokes on fat iron shots? Explore The Golf Swing Lab and Start Improving Your Golf Swing Today
Replace the # placeholder with your actual Golf Swing Lab URL before publishing.
Frequently Asked Questions About Fat Golf Shot Drills
Understanding why fat golf shots occur and how to correct them can help golfers develop cleaner contact and more consistent iron shots. Below are answers to five common questions about the best drill to stop hitting fat golf shots, proper swing mechanics, and improving ball-first contact.
What Is the Best Golf Drill for Ball-First Contact?
The towel drill is one of the best golf drills for ball-first contact because it provides immediate feedback about your swing’s low point. Place a folded towel approximately 4–6 inches behind the golf ball and practice striking the ball without touching the towel. This exercise encourages a descending iron strike, improves low-point awareness, and helps golfers develop more consistent contact.
Why Do I Keep Hitting Fat Golf Shots With My Irons?
Fat golf shots occur when your clubhead strikes the ground before contacting the golf ball. Common causes include improper weight transfer, early wrist release, poor balance, incorrect ball position, and inconsistent golf swing mechanics. These mistakes can move the bottom of your swing arc behind the ball. Practicing targeted fat golf shot drills can help correct these problems and improve your iron contact.
Can Poor Weight Transfer Cause Fat Golf Shots?
Yes, poor weight transfer is a common contributor to fat golf shots. When golfers leave too much pressure on their trail foot during the downswing, their swing’s low point may remain behind the ball. The step-through drill encourages pressure to shift toward the lead foot while maintaining balance and rotation. This helps promote cleaner ball-first contact and more consistent iron shots.
How Often Should I Practice Fat Golf Shot Drills?
For many recreational golfers, practicing golf fat shot fixes two or three times per week is a reasonable starting point. Spend approximately 10–15 minutes per session focusing on one or two specific drills. Begin with controlled half swings before gradually increasing speed. Prioritize quality repetitions, balanced movement, and consistent ground contact rather than hitting as many golf balls as possible.
Should My Golf Club Hit the Ball or Ground First?
When hitting a conventional iron shot from the fairway, your golf club should generally contact the ball before striking the ground. This ball-first contact allows the clubhead to transfer energy efficiently while continuing downward toward its swing’s low point. A shallow divot may form after impact, although taking a divot isn’t always necessary. Proper low-point control helps produce cleaner, more predictable iron shots.